 (click picture for high-res version).
Cat-Proofing Your Fence
Cat-proofing an existing "good neighbor" fence is easy to do, and allows your cats to enjoy the outdoors without you having to worry about them coming to harm from neighbors, cars, or other hazards. If done properly, it will keep the cats in and worry-free without looking like you've got a prison camp in your backyard.
To perform this project, you will nee the following items:
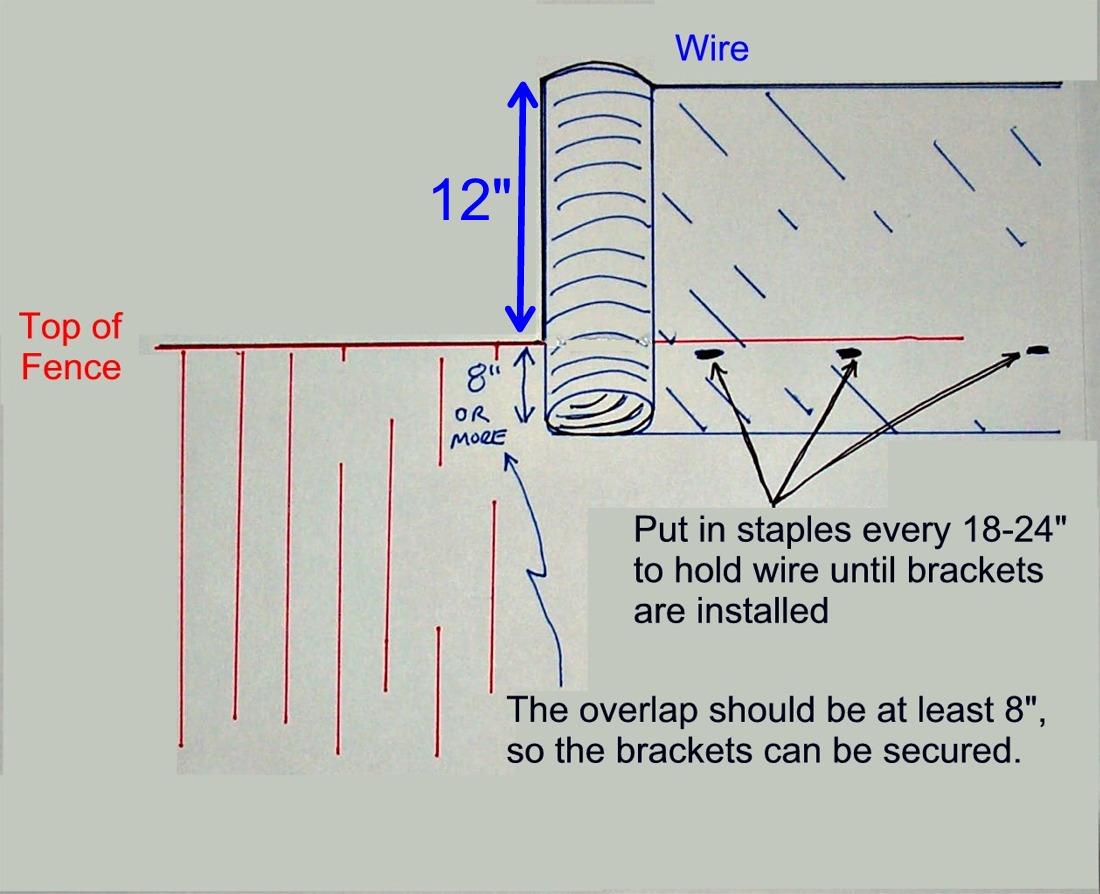
Chicken wire or other wire fencing material: 24" (or wider) is best, but at least 18" wide.
- I used chicken wire because it was less expensive than most of the other options, and easier to work
with. I opted for the enamel/ceramic coated type, both for increased longevity and aesthetic purposes.
- When determining how much to buy, get enough to cover the perimeter of your fence, plus 3 feet per gate. Also, subtract 1 foot from the length of each roll (which will be folded over and overlapped).
- The wire should be at least 18" wide, and 20-24" is perfect. When installed, the wire will extend about 12" out horizontally from the fence (on top of the bracket), and you'll need some extra to
secure to the fence itself.
- If your wire is less than 18" wide, you'll need to secure the brackets themselves to the fence, since there won't be enough "overlap" in the wire to be secure.
Large angle brackets.
-I used 12" x 14" ones from Stanley, which are just about the perfect size. You'll need to get enough to place one every 8
feet along the perimeter, plus one for each corner (4) and 4 more for the gate.
Wire cutters (diagonal cutters or tin snips).
Staple Gun.
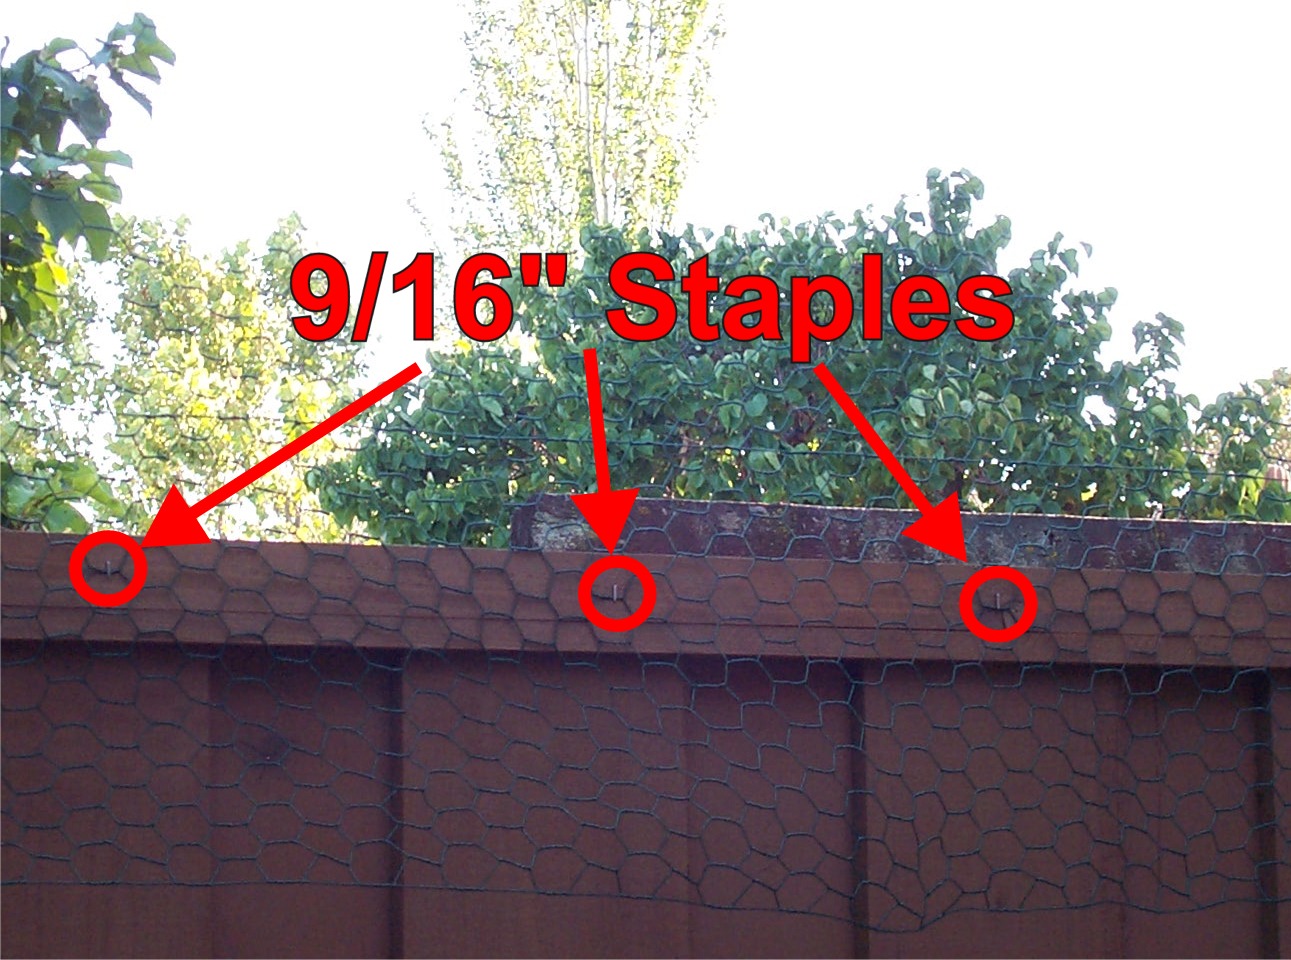
9/16" heavy-duty staples.
Wire or cable ties.
- Use these to secure the chicken wire to the brackets (I'd suggest cable ties because they are easier to work with).
Spray primer and paint.
- I would recommend to paint the brackets to keep them from rusting quickly and turning ugly.
Work gloves.
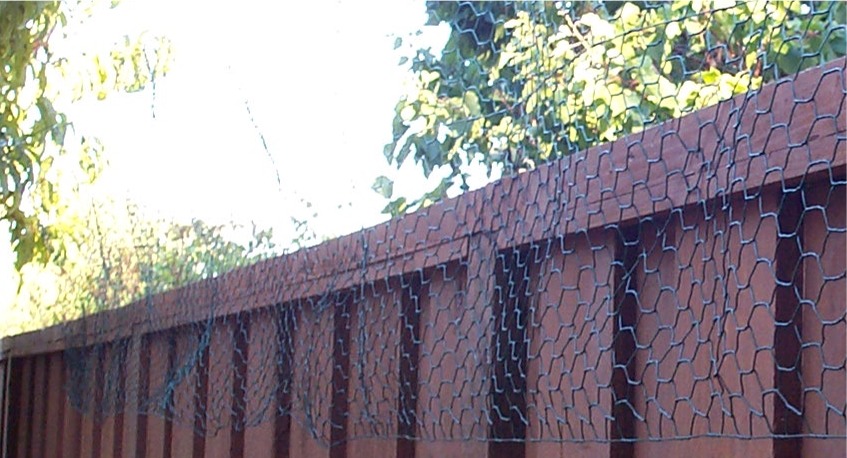
The first step is to unroll the chicken wire along the top of your fence. The wire should be positioned so that it overlaps with 8" or more of the fence itself, and that the centerline of the roll (where it will be bent forward) is high enough that a cat can't jump on or over it.
Start at the end opposite the gate and tack down the wire using a staple or two. I'd suggest bending over the first few inches of wire (if it doesn't already come like that) to make the sharp points less prominent. Then, continue to roll out the wire tacking it with a staple every 18-24":
(click picture for high-res version).
 (click picture for high-res version).
At the end of the roll it will look like this:
 (click
picture for high-res version).
(click
picture for high-res version).
Once each roll is tacked up, I again suggest bending over the last few inches (if it isn't already) to make the sharp points less easy to catch on. Then get the new roll. Fold over the first few inches if need be, and overlap 6 inches with the end of the old roll. Continue tacking.
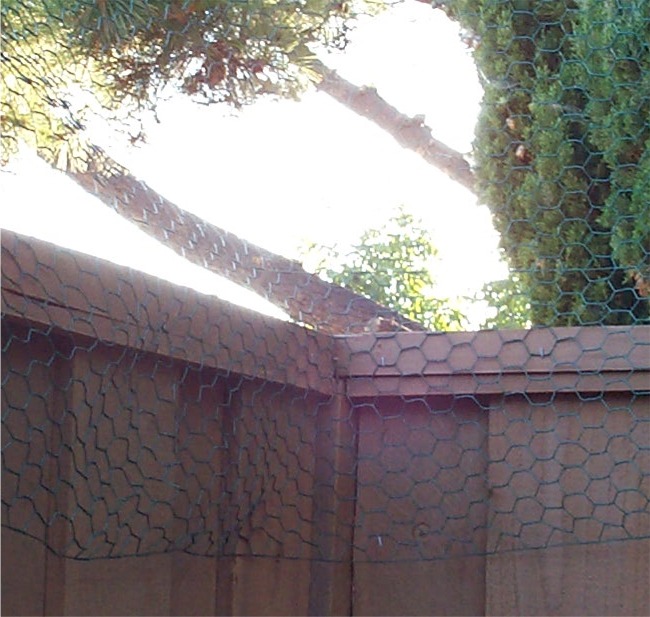
When you get to the corners, keep the wire tight and flush with the fence:
 (click
picture for high-res version).
(click
picture for high-res version).
Stop tacking once you get to within a foot or two the gate. Cut the wire so you have about 1 foot of excess. We'll eventually bend that over a time or two to make the end more durable and rigid to sustain it's shape when the gate is opened. Do the same for the gate itself.
Once the wire is tacked up, the next step is to install the brackets. By default, the brackets are spaced about 8 feet apart, depending on the wire you used (the stiffer the wire the greater the distance between brackets) and the fence configuration (try to line up with any existing posts as much as possible). Its easiest to start placing brackets in the middle of a side and then work outwards towards the corners. However, do not actually place the brackets in the corners until all of the sides brackets in place.
I used the chicken wire itself to hold the brackets in place by sliding the bracket through a hole in the wire and then "under" it (between the wire and the fence). That way when the wire gets tacked down, the bracket is held firmly in place:
 (click
picture for high-res version).
(click
picture for high-res version).
The wire must be stapled securely on both sides of the bracket:
 (click
picture for high-res version).
(click
picture for high-res version).
Instead of this method, the brackets can be fastened directly to the fence using nails or screws. But in most cases doing this is more work, and also leaves more of a mess when the fence is taken down.
Once the bracket is secured, fold the wire forward over the top of the bracket. Secure the chicken wire to the "forward point" and "angle" of the bracket using a couple of cable ties or wire.

When you get done, it will look like this:
 (click
picture for high-res version).
(click
picture for high-res version).
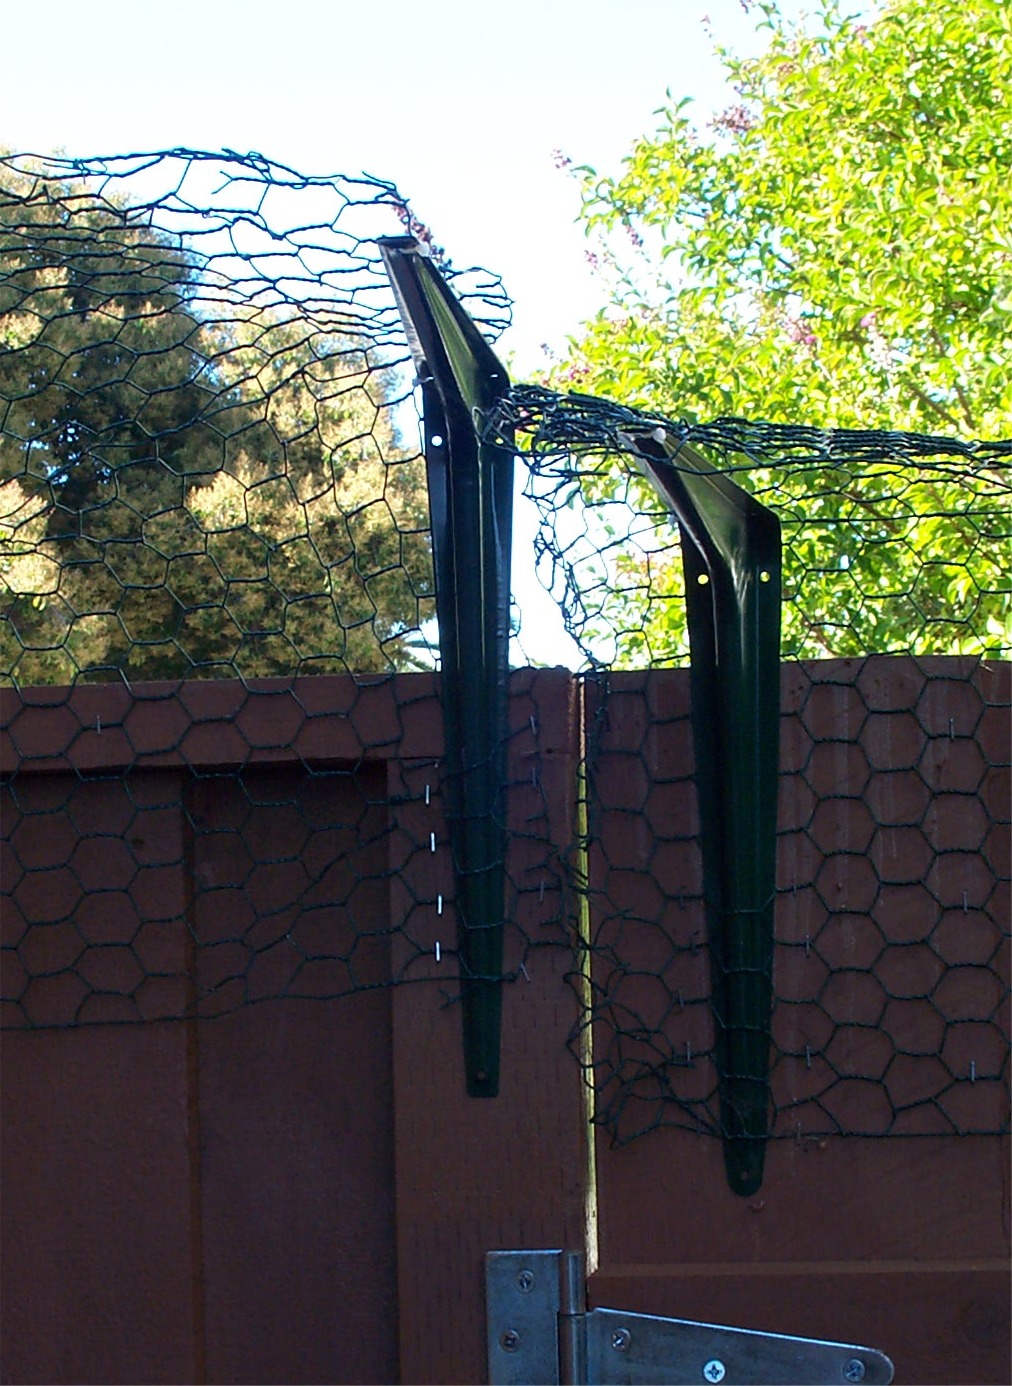
Now we're going to go back and put in the corner brackets. The reason it is easier to wait until now (after the sides are done) is that otherwise it is hard to judge how much the wire needs to be "folded over" on each side.
Pick the best spot within 6" or so of the corner in which to place the bracket. It doesn't matter which side it is on, so unless you have a visual preference, use whichever seems easiest based on the fence itself. Then neatly fold over the wire so it is flat with the top of the bracket. As you are looking at it from the edge, the folds will look like a "Z" (or "S"). Secure the wire folds to the bracket with the cable ties or brackets:
.jpg) (click
picture for high-res version).
(click
picture for high-res version).
 (click
picture for high-res version).
(click
picture for high-res version).
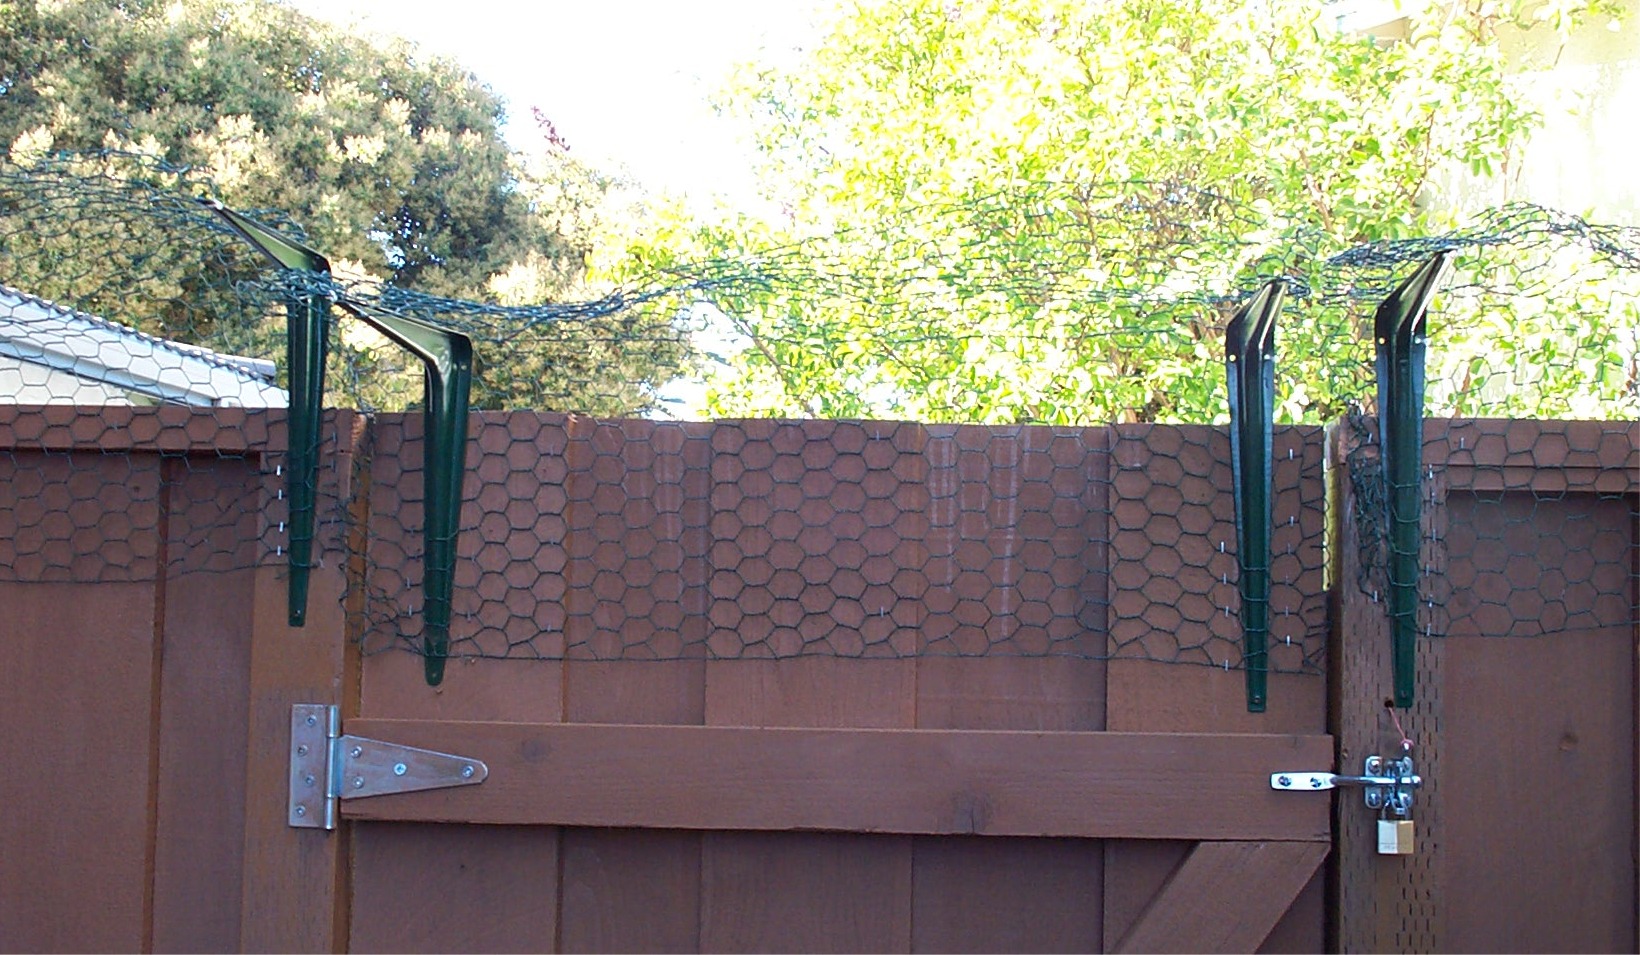
The last step is to arrange the gate. Cut a piece of wire the width of the gate plus 12 inches. Fold over 3 inches on each end twice to make the piece of wire the the same as the width of the door.
Using the same procedure as before, tack up the wire so that it is flush with the sides of the gate, but 3-5" below the wire on the adjacent fence. You can see that clearly in the picture below, looking at the bottom edge of the chicken wire.
 (click picture for high-res version).
Then, install the brackets, just as before. They should line up pretty well since the wire is lower, but you may need to adjust them so their top is low enough to clear the bracket on the post when the gate is swung open:
 (click
picture for high-res version).
(click
picture for high-res version).
Securely fasten the wire to the brackets using the ties or wire. Then, unroll part of the overlap on each end to "seal" the gaps on each end and tie-in with the rest of the wire fence. It should look something like this:
 (click
picture for high-res version).
(click
picture for high-res version).
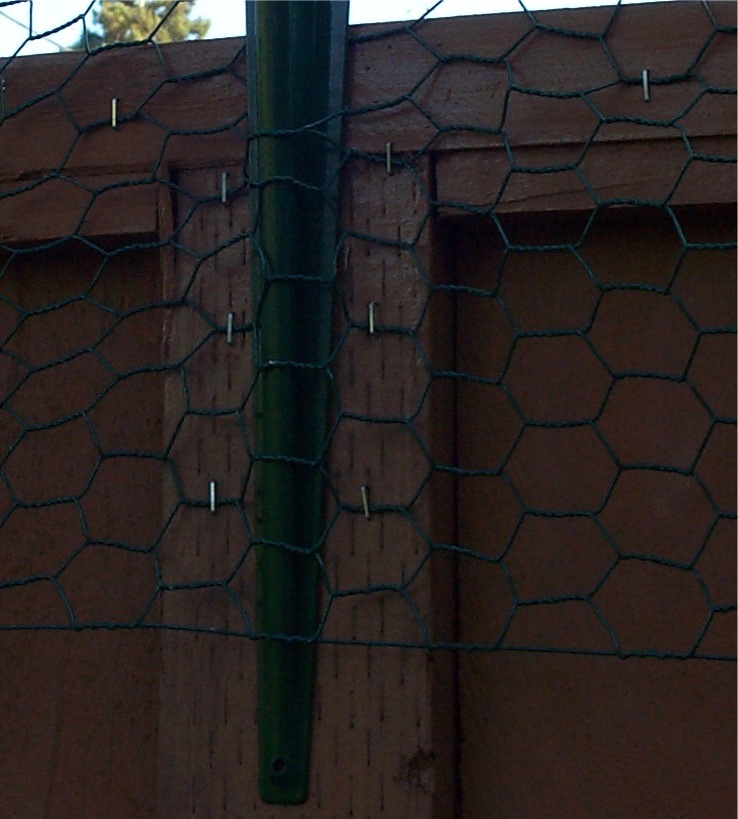
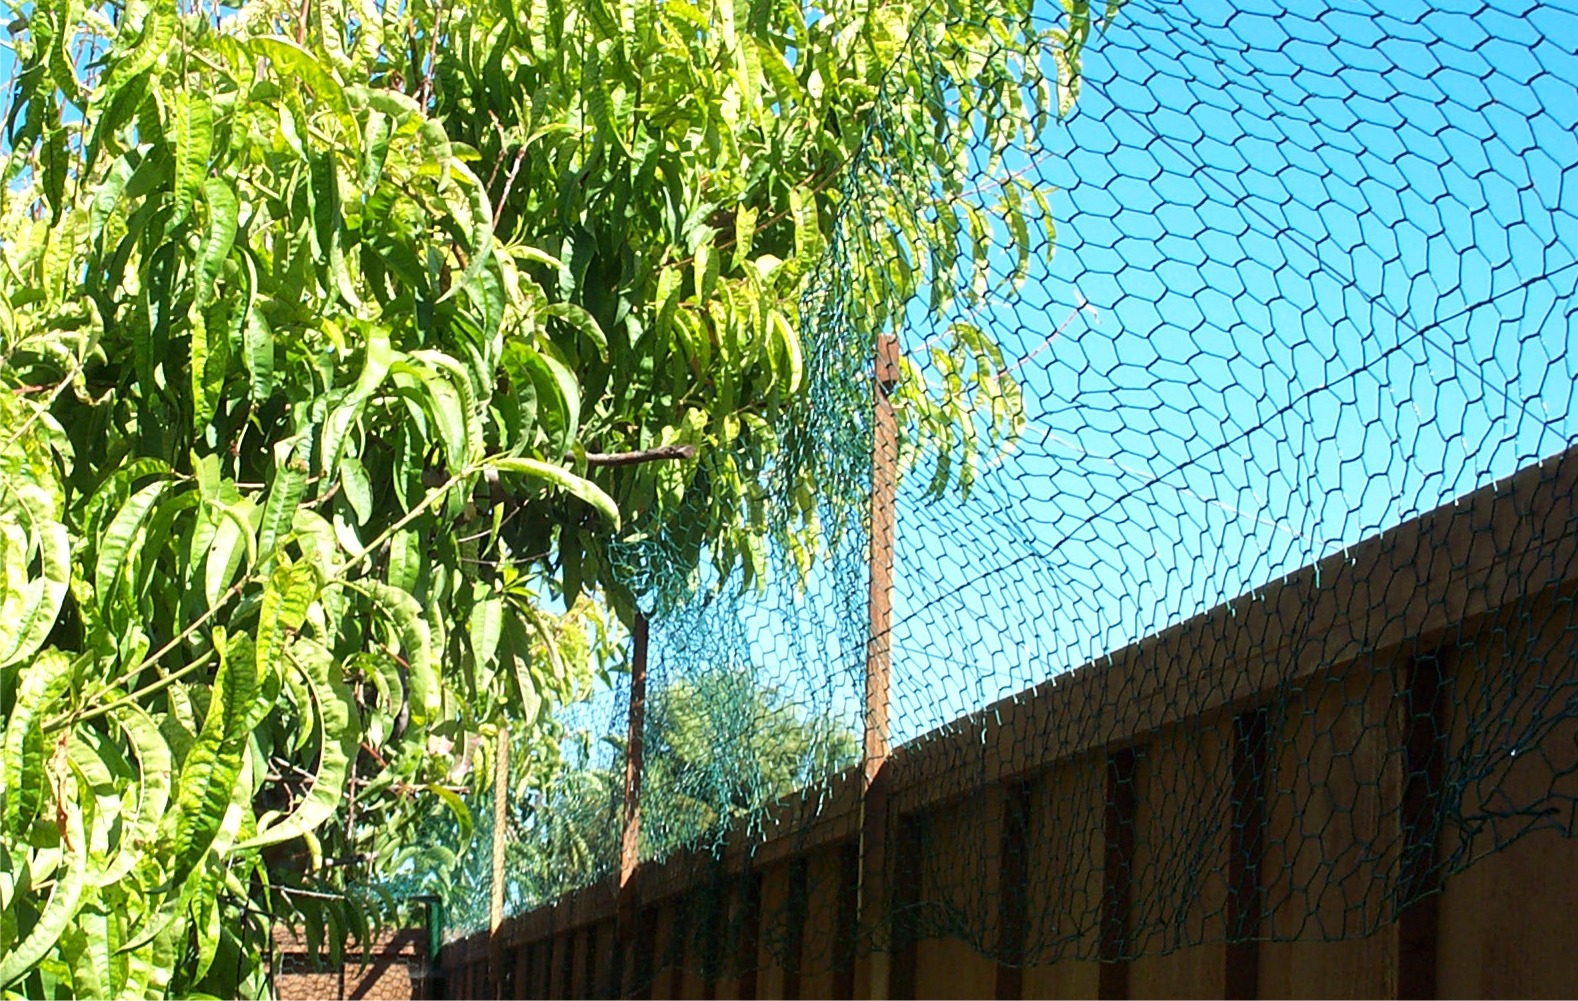
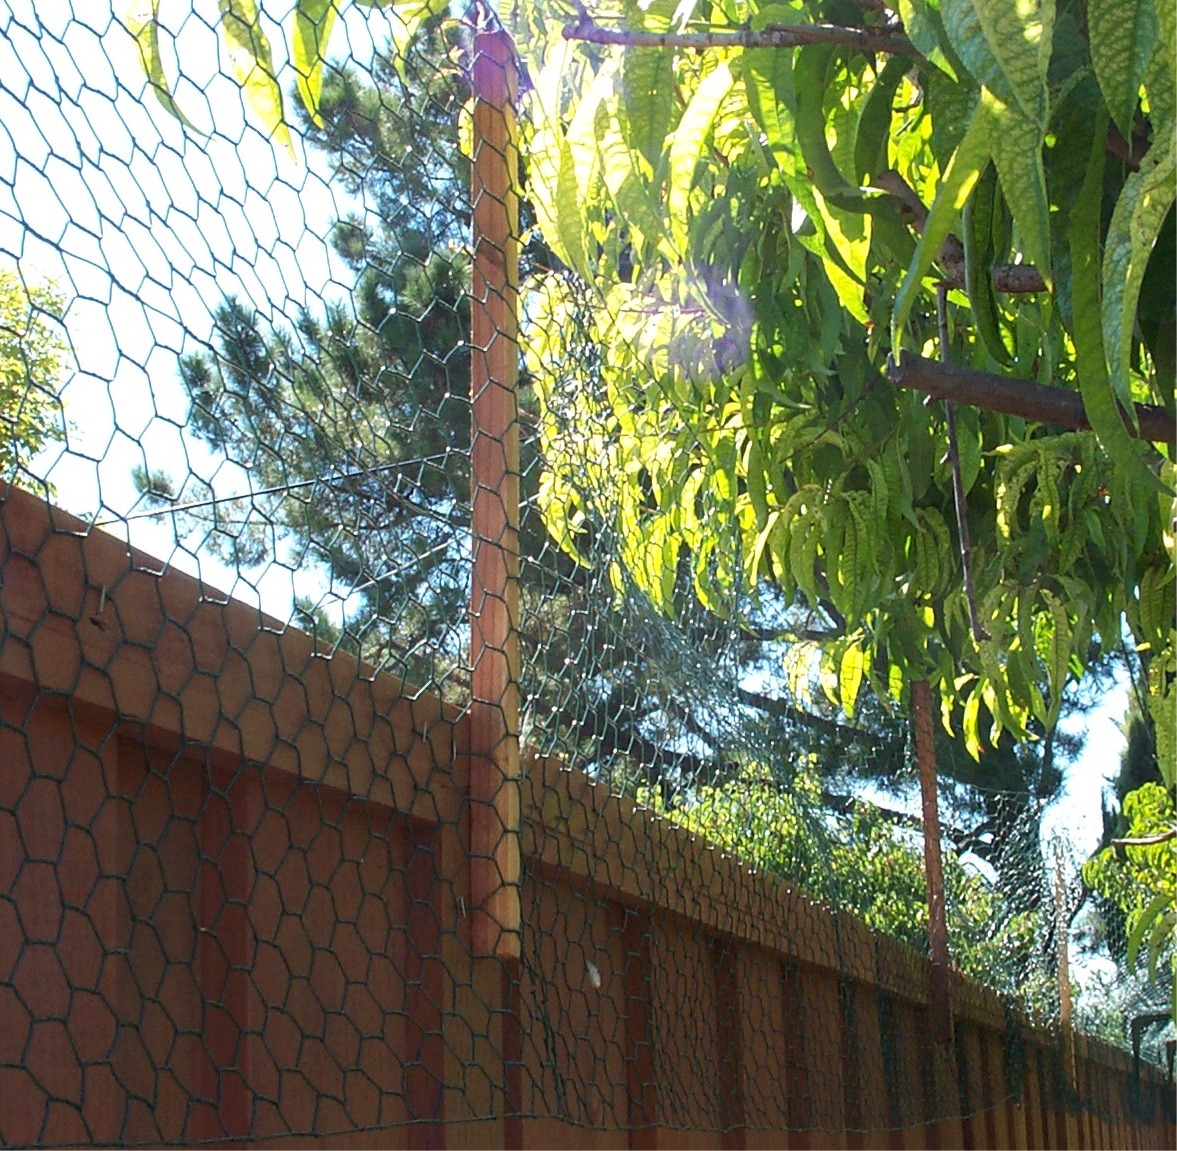
Trees or other objects that give the cats a "perch" present special problems. I handled mine in two ways. In one case around a fruit tree, I removed the angle brackets and used pieces of 1x1 redwood to have the wire go straight up. It's hard to see around the tree, but this is what it looks like:
 (click
picture for high-res version).
(click
picture for high-res version).
 (click
picture for high-res version).
(click
picture for high-res version).
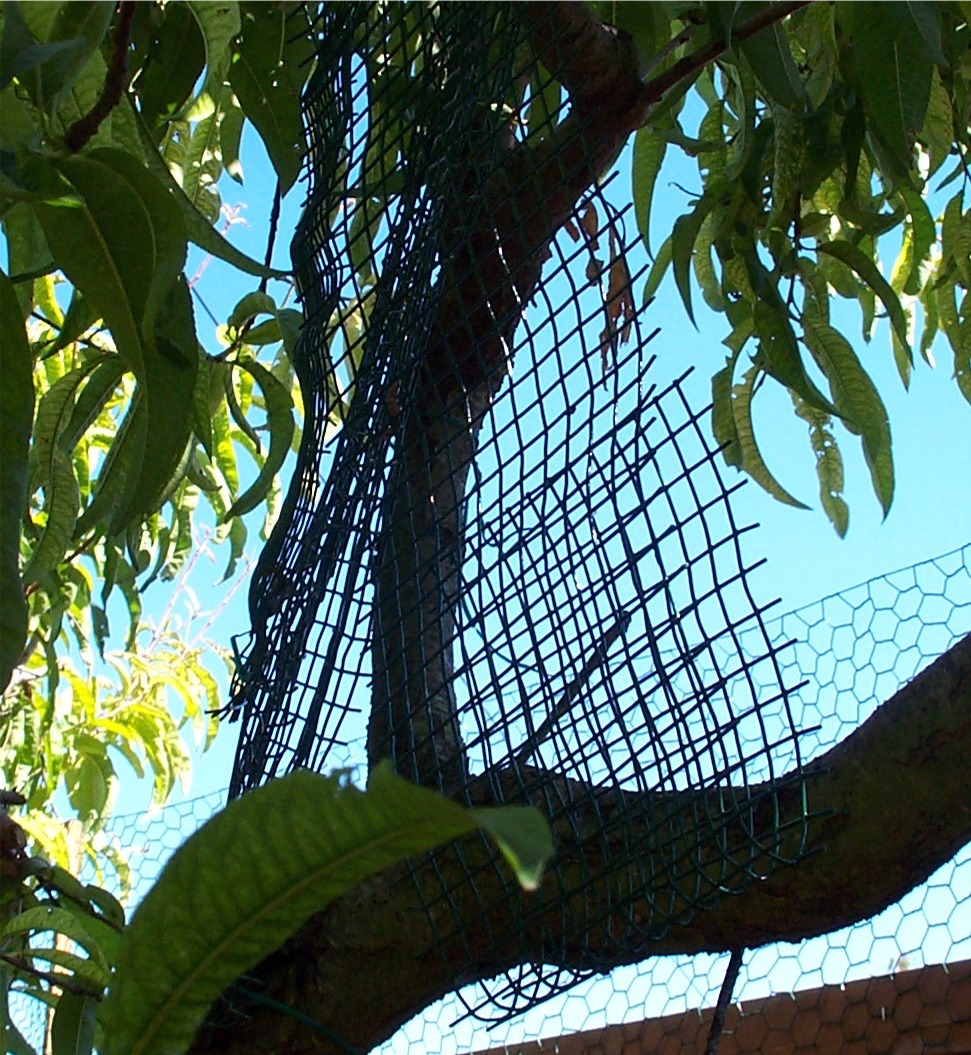
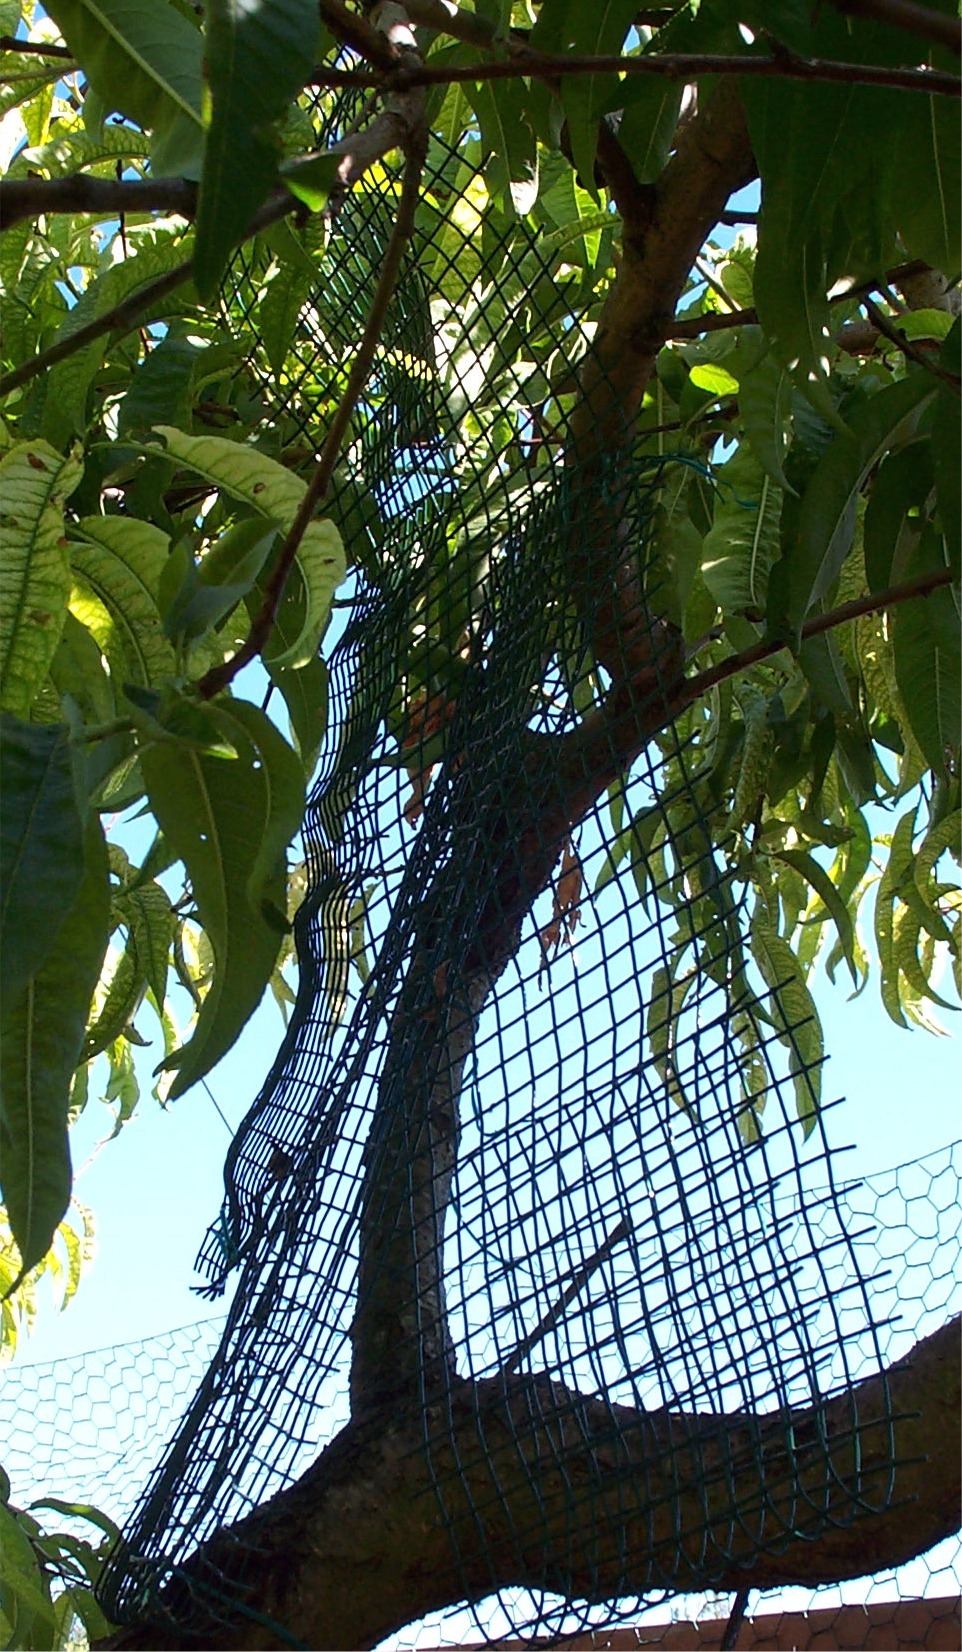
I also have one tree that might have enabled Norman (a proven escape artist) to get high enough and close enough to the fence to try and jump it, even over the chicken wire. To forestall even the thought of it to him, I used some 1/2" hardware cloth I had left from another project, and built barriers on the tree itself. As determined as he is, there's no way even he can get around (or over) them to continue up the branch.
 (click
picture for high-res version).
(click
picture for high-res version).
 (click
picture for high-res version).
(click
picture for high-res version).
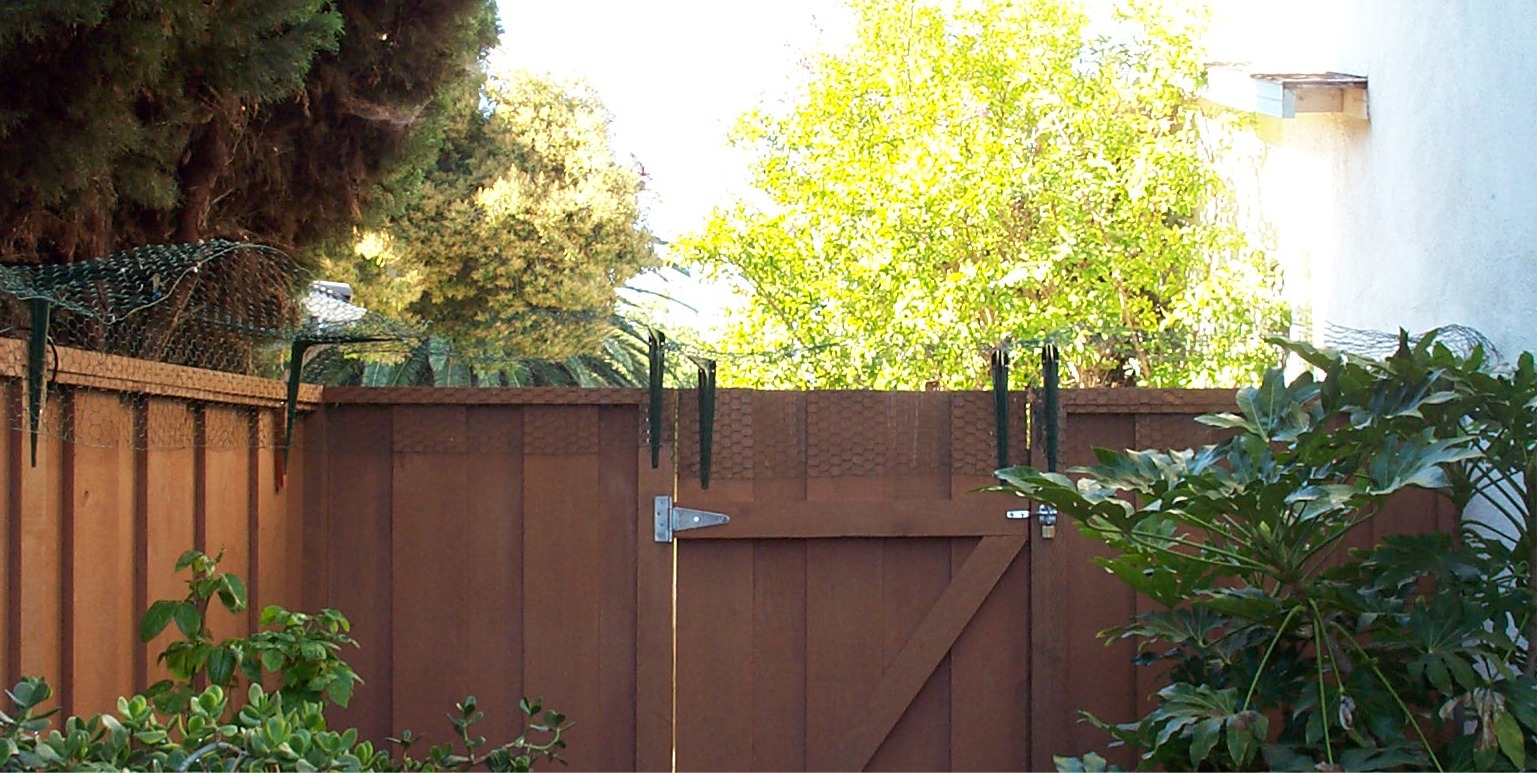
Before you know it, it's all said and done... and safe fun time for the furry guys! Even for the escape artist Norman (the gray and white guy in the pics).
 |
|
|
|
 |

